HVAC contractor fixing ductless mini-split system

Questions to Ask an HVAC Contractor

Finding the right HVAC contractor for your home can feel like a confusing, frustrating process. How do you know where to look? Once you find a specialist, how can you be sure they’re professional and experienced?

Thankfully, you’ve come to the right place.

One of the quickest ways to determine an HVAC contractor’s credibility is to ask him or her the following questions.

Where Can I Find Your Reviews and References?

If they have none, time to walk away. Today’s relevant and most trustworthy HVAC companies have an online presence because they know the value of meeting customer expectations online. If you’re doing research on your own, you should be able to search for the company by name in Google, and their business listing, along with all relevant information (contact information, website, any posted ratings and reviews), should appear.

If there’s no evidence of satisfied customer reviews, it might be a good idea to continue your search for an HVAC contractor.

What Services Do You Provide?

Ideally, your HVAC contractor will be well-versed in a wide range of techniques and services. If they are experts in only one facet of HVAC, working with their agency may result in frustration and inflated service costs, since other tasks will take up unnecessary paid time, or will require another contractor to step in and help.

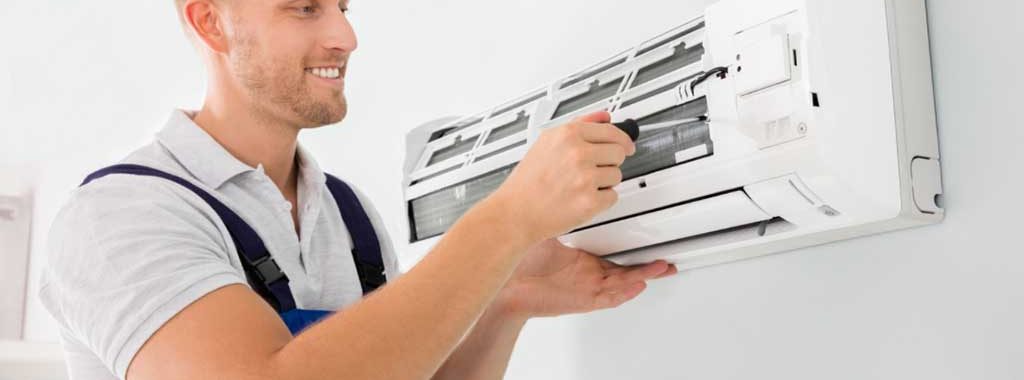
Which Certifications Have Your Technicians Earned?

In a perfect world, you’d like to have someone working with the internal wiring of your home who actually knows what they’re doing, right? We thought so. Asking about a company’s requirements for training and licensure for their employees is a completely appropriate thing to do, and may save you a disaster in both home and wallet.

It goes without saying: you’re much more likely to get top-notch service from HVAC technicians who are certified and trained.

Additionally, you might ask a follow-up question: “How long have you been in business?”

This will allow you to gauge the expertise and longevity of experience your contractor is bringing to the table. Most likely, if you’re seeking out an HVAC contractor, your home might have been on the block for a few years (or decades). You want to be sure your technician is familiar with the fragile components of an older home, as well as proficient in understanding new HVAC systems in newer builds. Experience is vital.

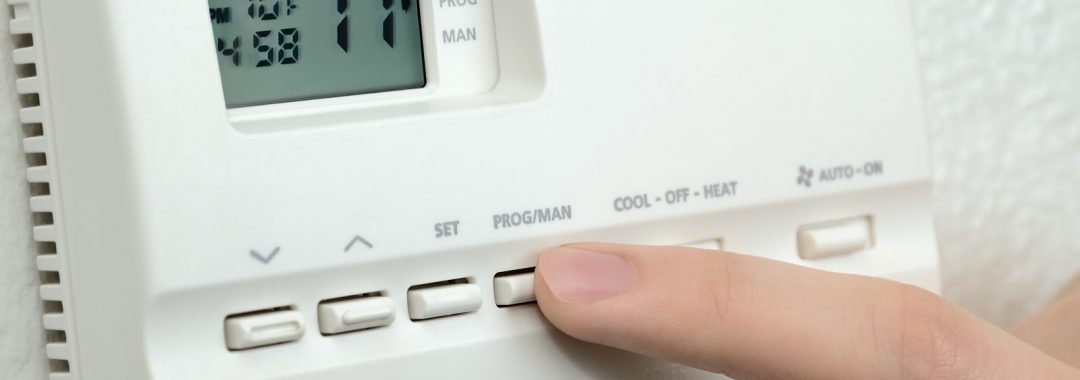
What Maintenance Programs Do You Offer?

Every home is unique, so every home’s HVAC needs will be different. Knowing what your HVAC company protects, guarantees, and maintains is an essential part of creating a partnership. Ask about the company’s agreements and policies, and whether they’re flexible depending on the home’s needs. Ensure everything is in the open before signing on the dotted line.

Essentially, this question could be phrased as, “What happens after installation?” Does your HVAC technician leave you hanging high and dry, or will they commit to tune-ups and maintenance if need be?

How Can I Be Sure Your Recommendations Will Address My Home’s Air Needs?

This is not your average “business check-in” question. Too many HVAC contracting companies take short cuts and aren’t privy to the latest technologies and developments in the world of heating, ventilation, and air conditioning. The bolder you are able to be with your question asking of potential HVAC contractors, the more clarity you will have regarding their fit for your needs.

HVAC companies should be methodical, thoughtful, and intentional in their approach to giving quotes, assessing home air problems, and fixing/replacing any dysfunctional mechanisms. If you sense any theme of being rushed, abrupt, or insincere in diagnosing your HVAC issues and concerns, it may be a sign to keep searching.

What is Included in Your Service Quote?

This question seems like a silly one, but it is a surefire way to guarantee that there won’t be any hidden fees that arise later; after you’ve signed and services are in progress. Specifically, be warned that in the installation of a new HVAC system, the quote may not ensure that the old parts of the previous system also be replaced (fittings, valves, pipes, connectors, etc.). Ask your HVAC contractor about their policies regarding this.

Good Guys Home Services: The Answer to Your Questions

Locally owned and operated Good Guys Home Services is the most trusted source for all your HVAC needs in the Fort Collins, CO area. We take our commitment to excellence very seriously and accomplish this by providing customers with services that surpass their expectations.

Our goal is to give you complete confidence in hiring our team of licensed technicians. As a family-owned business, we know how important it is for you to feel comfortable in your home. Having professional HVAC services allows you to have the amenities you need, such as a temperature-controlled home environment. With 15 years of experience, our certified technicians have the knowledge and tools necessary to identify and complete any furnace repair or installation.

When you call Good Guys Home Services, you’ll receive prompt service and a transparent, straightforward quote. Maintain a comfortable temperature and healthy air quality by reaching out to our team.

In fact, we believe that a home should offer a high level of comfort, which is why we offer pre-season maintenance, complete system upgrades, 24-hour emergency services, and quick and honest communication. Good Guys is reliable, credible, and professional. The search is over; reach out today!

Woman testing an old thermostat

How to Test an Old Thermostat

Is your home suffering from an inconsistent indoor climate, but your wallet seems to suffer from a consistent decrease in funds going toward your heating and A/C bill? It might be time to check the functionality of your home’s thermostat. Keep reading for the DIY step-by-step.

Northern Colorado homes in Fort Collins, Denver, and across the Front Range get a lot of quick weather changes. The overall comfort of your home shouldn’t be compromised by something as simple as an old thermostat.

Before implementing the following steps, first, determine if your thermostat is attempting to control the temperature inside your home at all. This can be completed quite simply: turn on the heat function of your home’s thermostat until it reaches 70 degrees Fahrenheit or above. Then, switch your system to A/C, and set it to run until it reaches 66 or so. If you do not hear your HVAC system activate and begin to cool your home, this is a sign of a potential thermostat problem.

Step 1: Turn off HVAC power

This can be done by switching the furnace to the off position if your system has an on/off switch. If not, you may need to cut off power by locating your home’s breaker box and switching off the circuit lever labeled “HVAC” or “furnace.”

Step 2: Remove thermostat cover

Use a flathead screwdriver to remove the main plate of the thermostat so that you are able to see inside. Depending on your thermostat model, you may have to remove the entire body of the device. This should expose the wires inside.

Step 3: Remove wires from terminals

The wires located inside your thermostat should be screwed to terminals marked R (red), W (white), G (green), Y (yellow), and C (common). Some thermostats have only two wires: either Red and White or Red and Green. Make note of these labels, or simply snap a photo with your phone. 

Unscrew and remove the wires from their various terminals. Be careful not to let them fall back into the hole in the wall. You can wrap the wires around a pencil if this is a concern. If there are more than two wires, pick only Red and White (standard colors for power and heat).

Twist the bare ends of the two wires (heat and power) together. Ensure that no other wires are making contact with each other or with these two.

Step 4: Turn the HVAC power back on

Return power to the furnace via the HVAC circuit breaker or furnace switch. If the blower turns on without the connection to the thermostat and the furnace burner ignites, the thermostat is defective or not connected properly.

Turn off the HVAC unit circuit breaker and untwist the R and W wires.

Step 5: Test other wires

If your system has all wires previously described, you may complete this test with the following wire combinations in addition to the R and W test.

Twist the R and Y wires together and turn on the HVAC power. Check to see if the air conditioning system ignites. Then, flip the HVAC switch back off.

Twist the R and G wires together and turn the HVAC breaker back on. The fan should now be working. After the test, turn off the HVAC power and untwist the wires.

If the HVAC passed all of these tests, the thermostat is faulty and needs to be replaced.

Time to Replace Your Thermostat

If you’ve determined your thermostat is non-functional and you’re tired of wasting money on a heating or cooling system that isn’t getting the job done, it may be time for a thermostat repair or a complete replacement. It’s time to call the professionals.

Don’t get left cold inside your home with an empty wallet. Call Good Guys Home Services in Fort Collins today and let us make it right!

A new smart thermostat installation

How to Replace Your Thermostat With a New One

Think it’s time to install a new thermostat?


There are a variety of signs that your old thermostat is going caput. If you have a failing or broken thermostat, it’s definitely time for a replacement. Or maybe you’re just sick of having high energy bills from your HVAC systems and want a fancy new smart thermostat.


No matter the reason for a new install of a thermostat, we’re laying out the steps of how to remove the old and install the new! Follow these steps in order for safety and to have a fully functional thermostat.


1. Choose Your New Thermostat

This is obvious but also necessary. You don’t want to remove an old thermostat that wasn’t working and replace it with a new one that is known to go bad after a couple of years. You also want to ensure that your thermostat will work properly throughout your home.


Research the type of thermostat that you want in your home and decide based on a few factors:

  1. Is the new thermostat compatible with my current HVAC systems?
  2. Will the thermostat provide the right comfort for my home?
  3. Are the reviews of the new thermostat positive?
  4. Does the thermostat meet manufacturer-specified voltage?
  5. Do I want wireless connectivity?


Smart/learning thermostats have wireless connectivity to devices such as your smartphone. They also don’t require much attention as they are programmed to learn as you use them. They are a terrific solution for the comfort of homes.


2. Turn Off the Electricity

Before starting on your new thermostat installation, turn the power off to your HVAC systems. Anything that’s connected to your current thermostat should be switched off. You can do this by going to your home’s breaker system and finding your air conditioning unit, furnace, and anything else related to the heating and cooling of your home.


If you are entirely uncomfortable with trying to find the breaker switches to your HVAC systems, you can turn off the main breaker to shut everything down.


You’ll be dealing with loose wires, so it’s better to be safe and turn the power off. You may also turn the power off to your air conditioning and heating units by directly flipping the switches on the units to “off”.


3. Remove the Old Thermostat

This is a 3-part process for removing the old thermostat.


  1. Remove the face (control unit) to the old thermostat, exposing the wires inside. It should come off fairly easily. If your thermostat runs off of batteries, this is how you’d normally remove the face for battery replacement.


  1. Disconnect the wires. Remember the placement of the connected wires as you’ll need to reconnect them later on. It’s easier to just take a photo of the wires to save yourself a headache.


  1. Unscrew and remove the thermostat mounts connected to the base of the thermostat. Remove the base from the wall entirely.


4. Install the New Thermostat

When you install the new thermostat, ensure that you are following the manufacturer’s diagram appropriately for wiring and other specifications.


  1. Put the base on the wall and thread the circuit wires through the appropriate opening specified on the thermostat base. Make sure the wires are tightened.


  1. Mount the thermostat base on the wall using the respective screws. Ensure that there are no openings. If there are any openings, plug the hole with appropriate materials that are fire-resistant.


  1. If necessary, install the batteries to the thermostat’s base.


  1. Secure the control unit to the base after the base is fully mounted.


5. Turn on the Electricity

Now that you’ve fully secured the thermostat, turn the electricity back on. At this point, everything should be operational. Reset the thermostat to its default settings and ensure that the power is working.


To test your new thermostat, program it to the comfort of your home and turn on the heating or air conditioning unit. If the units aren’t functioning, check the breakers again to ensure they are on. If they still aren’t functioning with the new thermostat, refer to the thermostat instructions from the manufacturer.


It is rare, but sometimes, things can go array when you replace a thermostat. If your newly installed thermostat isn’t working as it should, consult the manufacturer or hire a local HVAC contractor to come out to inspect the situation.

A local HVAC contractor will have much more experience in configuring thermostat installations due to their extensive knowledge of servicing homes in your area. If you’re in Northern Colorado, Good Guys Home Services is always here to help. Contact us today if you need assistance with the installation of your thermostat or any HVAC needs. We’re here to ensure you are always comfortable in your home.

Woman wrapped in blanket in a cold home

How to Heat Up a Cold Room

Is it freezing in your house?


Your thermostat says it’s a comfortable 73 degrees but there you are sitting in your living room in a sweater with a blanket wrapped around you like it’s 43 degrees. Is the thermostat lying?


There are plenty of things that can lead to a single room or an entire house getting colder when it shouldn’t. Weather is the main contributor to a colder home, but shouldn’t your rooms be a consistently comfortable temperature? Shouldn’t your heater kick in and solve the problem?


Maybe your heating system is on and it’s just not able to get rid of the cold in one room.


Colorado homes can get quite cold during the majority of the year, but we rely on our HVAC systems and the sun to heat up the house. Unfortunately, many residents still find themselves with a cold, uncomfortable living space. Your central heating system can only work so hard to keep the entire house warm, but if there is another issue occurring, the HVAC won’t be able to fix the problem.


Not all rooms are going to be at the same temperature. Uneven temperatures run throughout most homes. What’s really annoying is when a room is just too cold. So, what could the problem be?


Lots of things.


Check for Drafts and Air Leaks

If the room is colder than usual and recently became cold there could be cold air leaking in. Check your vents, air ducts, doors, and windows for air drafts. Wind and cold outside air can be trickling into your home through old/bad seals, cracks, or slits. Your home is built to withstand the cold air that tries to find its way indoors, but an old or damaged seal creating exposed openings will let air in.


This cold air will eventually find its way into the rest of the house. If it’s in one room, check all sealed areas that could be exposed.


Is the AC System Running?

As simple as it sounds, the AC unit could be turned on. Buttons get pushed unintentionally and “cold air” might be selected on your AC system. Double-check to ensure that the AC isn’t on, because that will only kick out cold air. If it is on, turn it back to your intended settings… off. If it’s on and it isn’t selected to run in the settings, then you could be dealing with a bigger problem that requires a professional HVAC contractor to come and take a look.


Check the HVAC Thermostat Settings

The thermostat could just be set to the wrong settings, like the AC running. You’ll need to check your thermostat to see if it’s holding the right temperature, running the correct program, and the heater is set to “on”. If you have multiple thermostats, check each one, but especially the thermostat in charge of the cold room. Sometimes, a thermostat could be old or wires have loosened.


Check the Furnace Pilot Light

If your furnace is gas-based, the pilot light could be out. The pilot let is a flame in charge of lighting the gas to the furnace. Your furnace’s pilot light will automatically ignite when the furnace is turned on. A dimmed or unlit pilot light could be a simple fix or something bigger. Since the flame relies on gas, if the spark is out, the gas could still be leaking. If the gas is out and the spark works, then the gas source needs to be inspected.


Look for Closed Vents

Vents are used to pump air into a room. If a vent is closed, that means the warm air can’t enter the room through the source. The only other way that the warm air can enter the room is through other rooms, which isn’t very reliable to keep another room warm.


If you notice that any of the vents are closed, open the latch all the way to let that cozy air in.


Insulation Could Be Faulty

Faulty insulation can occur and it’s difficult for the heating appliances to help the room if the insulation isn’t working. Poorly installed insulation can let the cold air in through the walls. If it is the insulation that is causing the problem, you’ll need to replace it. This can be costly and timely to fix, but it needs to be done if you want a warm room while keeping your energy bills low.


Get an Electric Space Heater

If everything in your house is running and you just can’t get the room to heat up, get an electric space heater. Many of them are very inexpensive to buy and get the job done. However, they use plenty of electricity, so your bill may be higher than usual. Since these appliances run on a lot of electricity, it’s wise to not have any other devices plugged into the same circuit. Doing so could trip the breaker or blow the fuse.


Hire a Colorado HVAC Company

You can troubleshoot to find out what the problem is, or you can hire a professional HVAC contractor who has experience with heating issues. Good Guys Home Services inspects, repairs, and installs furnaces, boilers, thermostats, heat pumps, and ductless systems. We do full inspections to understand exactly what the problem is, instead of fixing something that isn’t broken.

Contact us today to heat up your home so you can be comfortable again!

Old Honeywell home thermostat on wall

Signs You Need a Thermostat Replacement

Are you having problems with your home thermostat system? It’s alright, many people neglect their thermostat and naturally assume it’s running just fine.

It’s typically at the point you notice a significant temperature difference or a higher energy bill that you start your detective work for finding the problem to your HVAC problems. Most likely, it’s just time for a new thermostat.

The home or apartment’s thermostat is the brain of the HVAC system. If it’s having some technical issues or is just old, you’ll notice some differences in your electric bill and air comfort.

Do yourself a favor and check your thermostat(s) every now and again to make sure it’s functioning properly. There are many signs that your thermostat is failing you and a replacement is necessary. Use this checklist to discover if your thermostat is the problem for your HVAC ailments.

8 Warning Signs of Your Thermostat Failing

  1. The HVAC system isn’t running: Typically, you’ll notice a temperature difference in the home or apartment if the HVAC system isn’t on. This indicates that something might be wrong with the thermostat itself and requires you to look at your settings to make sure the heating or air conditioning unit is supposed to be running. You can also check the AC unit or furnace to see if the systems are running by intaking or outputting air through the vents.
  2. The HVAC system won’t stop running: Another indication that your thermostat might be having problems is that the heater or air conditioning won’t turn off after you’ve set it to turn off.
  3. Your home is too hot or too cold: You set the temperature in your home via the thermostat. If the thermostat is faulty, you’ll notice that the temperature in the living space is moving in the opposite direction of your comfort.
  4. Inaccurate thermostat display: Every thermostat has a display (excluding non-programmable thermostats). When the display is blank, missing regular information such as the current temperature, or is reading the wrong temperature, this could mean it needs to be replaced.
  5. Thermostat buttons aren’t working: If your thermostat has buttons for programming (not like one of those fancy Nest thermostats) that aren’t working when you push them, it might be that the buttons have loose wires. Instead of trying to fix these buttons, it might be best to just replace the thermostat.
  6. Deficient cycling: When your HVAC system is randomly turning on without your request, shuts off early or doesn’t finish its cycle to bring the living space to the right temperature, this could also mean you have a failing thermostat.
  7. You receive a high energy bill: No one likes it when you have to leave the HVAC system on for longer than normal due to the change in weather, but it can be a necessity. What indicates that the thermostat might be overworking the AC or heater is when you receive a higher energy bill than you’re used to for that season.
  8. Thermostat is outdated: There are a variety of thermostats on the market nowadays, but anything with a needle is definitely considered old. Typically, thermostats are meant to last 10 years or longer. After the decade passes, your thermostat may start to malfunction. Check the model of the thermostat to see how old it is before you make the diagnosis that it’s just outdated so “it must not be working properly”.

How to Troubleshoot a Bad Thermostat

  1. Replace the batteries: Sometimes, when a thermostat is acting out, all it might need is new batteries. If the thermostat runs on batteries, replace the batteries it needs to run with new batteries and see if that does the trick.
  2. Flip the circuit breakers: Every now and again, circuit breakers need to be flipped to restore power to certain parts of the home or apartment. Try flipping the breaker, wait 30 seconds, then turn the power back on.
  3. Check and adjust the thermostat settings: Your thermostat might revert back to factory settings if there is a power outage or the flip of a circuit breaker. It’s quite obvious, but maybe the thermostat unit just isn’t switched to ‘on’ or ‘hold’? Play around with the settings a bit to make sure the thermostat is on the settings you want, on the time periods you want. You should also adjust the settings to either 5 degrees lower in the summer or 5 degrees higher in the winter to see if it kicks on. You’ll hear a ‘click’ for when the HVAC system is adjusting to the new temperature.
  4. Check the wiring: Wiring can become loose, old, or dirty from dust. Electronics are notorious for attracting loads of dust. If you plan on touching the wiring, it might be best to turn the circuit breaker off to ensure you don’t get electrocuted.

Hire an HVAC Contractor for Thermostat Replacements

If none of the above troubleshooting options work for you, there could be another issue wrong with the thermostat, AC unit, or furnace. A professional HVAC contractor should be contacted to inspect the issue so you stay safe, the wiring still works, and no other problems arise. Contact us at Good Guys Homes Services in Colorado. We take care of all of your HVAC needs, including inspecting thermostats and replacing them.

Call us today to fix your thermostat!